If you have an older home or are just looking to upgrade your baseboards, adding a new coat or color can bring them to life. If you have new wall colors, maybe they're looking kind of dull. For this home improvement project, you have a couple of options. All of them involve some level of painting in place. If you're reading this - I am guessing you didn't hire it out, and you shouldn't! Aspiring DIY'ers can paint anything with some patients and prep work.
Scroll below for an overview of painting your baseboards with hardwood floors.
Option 1: Remove and Paint Baseboards
In most cases, this is the least preferred option. Removing baseboards can be a tedious task, you need to be careful not to damage them, and the drywall, while competing with caulk and other elements that have accumulated over time.
If you are up for the challenge of removing your baseboards, and prepared to reinstall them, you have an opportunity to simplify the baseboard painting process and minimize issues with getting paint on your hardwood floors.
Option 2: Paint Baseboards in Place
For the most part, this is unavoidable. Whether you are painting the baseboards in place by design, or doing touch up after you have painted and installed. You will most likely need to do some form of painting in place to cover up nail holes, gaps, and caulk.
Option 3: Paint Baseboards Before Installation
Similar to removing and painting baseboards, this process is used if you are replacing baseboards or performing work as part of a larger project. It is considered ideal because it avoids some of the major challenges of painting existing baseboards – removing baseboards around wood floors and painting in place.
When you’re ready to paint your baseboards, you will need:
- Tape
- Paint (based on your baseboard color and gloss)
- Rosin Paper/Ramboard/Painters Blanket
- Brush or Roller
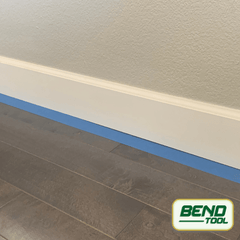
Using painters tape on hardwood floors, run stretches of paint along the length of the baseboard. If installed above the floor (as it should be) you may be able to find a small gap to slide the tape under the baseboard.
Step 2: Tape the top of the baseboards (the wall)
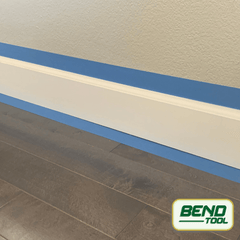
This could be if necessary, depending on your color and how steady of a hand you have. Run a piece of tape along top of the baseboard and the caulk to prevent yourself from painting the wall.
Step 3: Add rosin paper
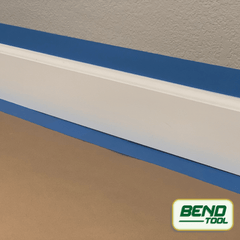
If you don’t want to use rosin paper, consider a painters blanket or even ramboard – the point is to give yourself some covered distance from the wall to protect your floor. We like to add another layer of tape on top of the tape already in place, to connect the rosin paper and prevent any seepage to the hardwood floors.
Step 4: Paint the baseboards
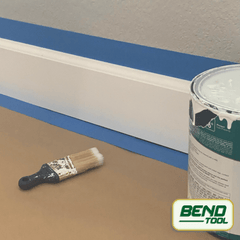
Using either a roller or a brush, start to paint your baseboards. Be prepared to work in sections to make the use of your prep setup, and apply several coats. To develop a process, consider starting with a steady, light coat on the bottom next to the tape and work your way up.
See our guide “How to Paint Baseboards” for more information.
*Shoe molding and quarter round: if they were installed properly, shoe molding or quarter round at the bottom of the baseboard should be nailed directly to the baseboard itself using a 3d or 4d nail.


