Baseboard trim installation covers a wide range of preparation, including initial planning, measuring, procuring and purchasing, cutting, fine-tuning, and eventually installation, then caulking, hole filling, and painting! One area that gets overlooked amongst this is all the tools required, and other tools that are nice to have.
Once you start working with tools required, or recommended, for installation, you will be amazed at the sheer number of things you can make. Just like in most other crafts, in carpentry and baseboard installation, it is important to be familiar with the tools you will use first before embarking on your first project. Knowing what particular tools are used for a particular task and why.
Preparing the Baseboards
Getting your area ready to work can be a separate project. Whether the area is being demo’d or installed for the first time, you still need to measure, identify your angles or anticipate any funky situations, and get the area ready for installation.
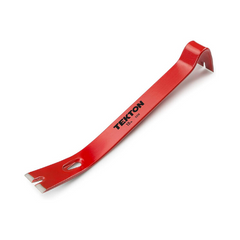
1. Baseboard Remover (Trim Puller)
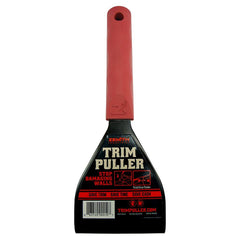
Is it required? No, it’s not. A baseboard removal tool can easily be replaced with the backend of a hammer, pry bar, or crowbar. However, most are specifically designed to be wider than all those other options, making it easier to pull the baseboard out past the screws.
How will I use it? If you are replacing the existing baseboard, you will use it to remove the baseboards already installed. However, if you are installing new baseboards only, you may find it useful for removing baseboards you installed incorrectly…
2. Pry Bar
How will I use it? To either remove existing baseboards or other items that may be in the way like nails, door and window casings, or remnants from the drywall installation.
3. Measuring Tape
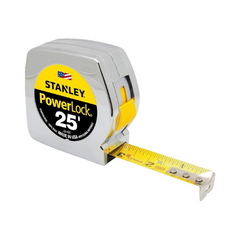
Is it required? Yes, it is. No matter what else you use to measure your baseboards and walls, nothing will provide the agility and functionality of a tape measure.
How will I use it? You will use it for measuring everything (twice). The linear feet of your wall, double-checking your baseboards after cutting them, and anything else you can think of. While a measuring laser is convenient and accurate – they don’t work in tight spaces or for double-checking the length of your board.
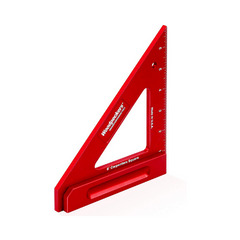
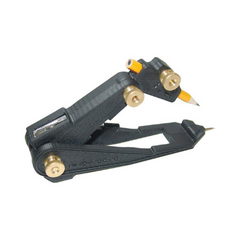
4. Bullnose Corner Gauge
Is it required? It should be! Very helpful for installing trim around rounded, bullnose corners.
How will I use it? Our Bullnose Corner Gauge creates marks on either the wall or directly to the baseboard (or both) for clean miter cuts around bullnose corners. In our experience, if you have more than three bullnose corners in your project (most homes have 20+ bullnose corners), you are going to appreciate having this.
5. (Digital) Angle Finder or Miter Saw Protractor
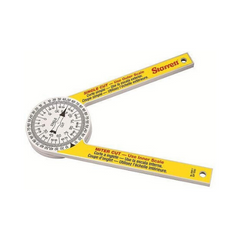
How will I use it? Angle finders, also called a miter saw protractor or just a protractor, and finally, a goniometer is possibly the best tool for measuring baseboard angles. Check out Starrett's. You can place the device up to the angle on your wall and identify the actual degrees. After the drywall is installed, common angles like 90-degrees and 135 degrees can adjust. The angle finder can help identify true angles for precise miter cuts resulting in a clean look on your baseboards. Some of the non-digital options include a dial with the miter degree for your saw.
6. Stud Finder

How will I use it? To best secure your baseboards, you will want to use a longer (2’’ – 2.5’’) nail and secure the baseboards to the wall by hitting the studs behind them. How do you accomplish this? By identifying the stud before nailing. We like to take the time a precisely locate the studs and mark them with painter’s tape. Check out Zircon's stud finder.
7. Mechanical Carpenters Pencil (or any carpenter's pencil)

Is it required? Yes, it is. You may be tempted to substitute a pen or sharpie or something else – but nothing is as beneficial as a pencil.
How will I use it? To apply your measurements and marks on the walls, baseboards, studs, making calculations and notes. A pencil and pad of paper is a must for any carpentry project. For more information check out our post What is a Mechanical Carpenter Pencil?
Check out our mechanical carpenter pencil at our store or head over to Amazon.
8. Speed Square
How will I use it? Although they look simple, a speed square carries many benefits for carpentry projects. We like to use them for inspecting our inside corners to determine how out of plumb they are. Another use is for extending the marks on our baseboards for better visibility (and more accurate cuts). Woodpeckers makes great speed squares.
9. Laser Distance Measure
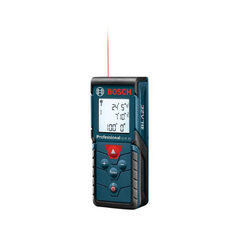
Is it required? No, it’s not, but it sure is nice to have.
How will I use it? A laser distance is an excellent tool for getting incredibly accurate long-distance measurements. No dealing with a cumbersome tape measure fighting you and causing you to question your accuracy. Most of these devices come equipped with storing mechanisms so you can measure rooms on the fly. If you purchase one, you’ll find they have many other uses and will come in handy for years to come.
10. 5 in 1 tool
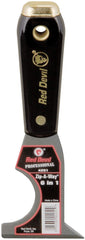
How will I use it? 5 in 1 tool, 7 in 1 tool, 9 in 1 tool, they’re all the same. We use these to scrape the drywall for a nice even surface to attach the drywall to. In our experience, the older your home the more useful they become. They can help prying baseboard from the wall, removing nails, dislodging caulk and the list goes on.

Cutting Baseboards
Cutting is when you start to find out how well you are prepared. Quality cutting will make or break your entire installation – there is a reason why you measure twice and cut once. Try to anticipate all of the situations you are going to encounter, and which saw will work best for it.
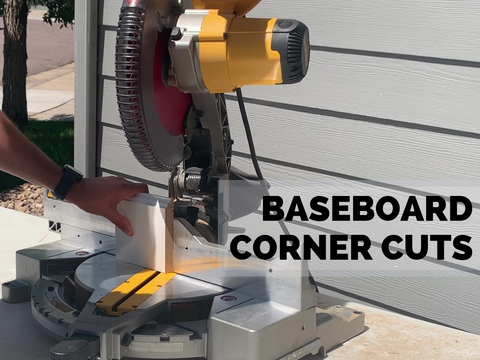
11. Compound Miter Saw
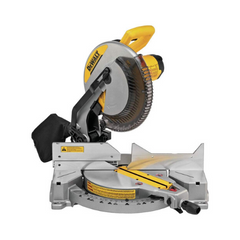
Is it required? You can get another type of miter saw (chop saw, sliding miter saw, dual compound miter saw), but for 90% of users, this one is the essential baseboard cutting tool.
How will I use it? A miter, by definition, is a joint between two pieces of wood. When installing baseboards, you going to have a lot of miters. Consider making miters for inside corners, outside corners, bullnose corners, 135-degree angles… and then all the cuts to get your baseboard to length. A compound miter saw will accomplish all the tricky cuts and the standard cuts. If you have tall or wide baseboards or plan on doing a lot of cutting over the years, you may want to consider one of the other types of miter saws.
12. Table Saw
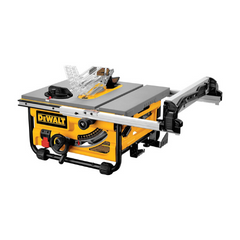
How will I use it? Table saws are excellent for rip cuts, or lengthwise long cuts that are not possible for a miter saw, or inconvenient with a jigsaw. A circular saw will also substitute for most of the same purposes a table saw would when installing baseboards.
13. Jigsaw
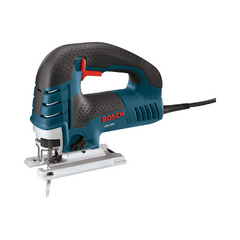
Is it required? No, it’s not.
How will I use it? Jigsaws are handy for creating unique cuts. The easiest example is when the baseboard runs into something along the wall (e.g., plumbing). Any time you need to create a notch around a corner, or next to other casing or molding, a simple jigsaw cut is a convenient solution. Experts using a jigsaw along with a Collins coping tool to cope their inside corners on the spot.
14. Coping Saw
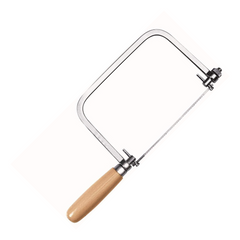
How will I use it? You’re going to like the results of coping more than running two 45-degree pieces together. Coping involves creating a cut (or several cuts) to create a nice profile shape of your baseboard. The two pieces can then closely intersect in a natural-looking way that protects better against caulking and seasonal expansion and contraction.
Fine-Tuning the Baseboards
After you make your cuts, it is possible (likely) they are going to need some touch-up, fixing, or fine-tuning. This is where the pros take the extra steps to ensure the baseboards are ready for cleaning looking installation – and for us DIY’ers should not be overlooked.
15. Sandpaper
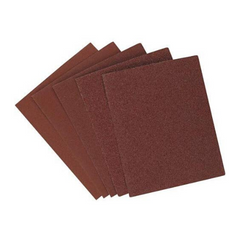
How will I use it? Cleaning up your miter cuts, fixing snags or loose baseboard fragments and prep for pieces before pre-assembly, and many more ways!
16. Wood Scribe
How will I use it? The best use case for the value of a wood scribe is when you are lining up against an uneven surface like brick and you want a nice, clean, tight fit. Carpenters use them along uneven floors, tile floors and other situations that may produce gaps or open areas.
17. Files
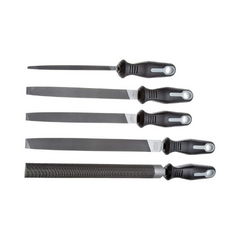
How will I use it? Files have similar uses to sandpaper but also help for cleaning up little spots of the baseboard during processing like coping.
18. Clamps
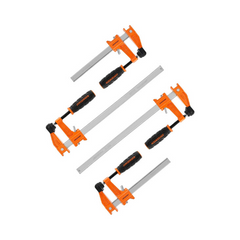
How will I use it? Having a couple of 12’’ clamps around can be helpful for any pre-assembly, gluing, sanding, and any other use case where you might need an extra set of hands (or clamps) to hold the baseboard in place. Check out Pony Jorgensen if you are looking to build out your clamp collection.
19. Collins Clamps
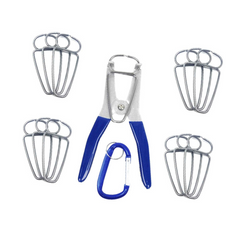
Is it required? No, they are not.
How will I use it? Also referred to as miter clamps, Collins clamps are designed to help hold miter cuts together for gluing. They are small, nimble, and pack a lot of force or resistance to hold profiles and cuts together. We highly recommend it.
20. Bench Vise
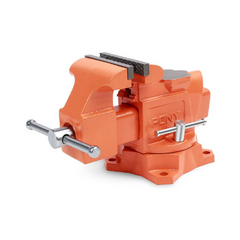
How will I use it? Bench vises can best be viewed as another set of hands. A good setup with a bench vise can help hold baseboards for cuts, measurements, fine-tuning like sanding and other particular situations. They can be really helpful for solo installations.
Installing the Baseboards
At this point – your baseboards are going on the wall. This is a rewarding part of the process – but can still involve plenty of opportunities for errors. Take the time to finish your project right and make your caulking, painting, and touch up work easier.
21. Nailset
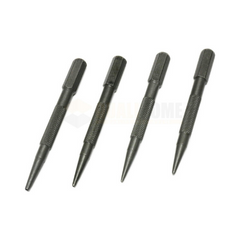
How will I use it? Nailsets help set nails below the surface of the baseboard so they can be covered, and painted or stained over. They can be useful with air nailers when things get hairy. They come in different sizes, depending on the size of your nail head.
22. Hammer
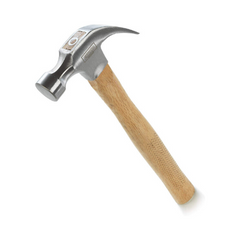
How will I use it? Hammers can help both remove and install baseboards. We use them to help pry baseboards from the wall and hammer in any nails that didn’t make it all the way. Hammers can also be helpful in makeshift situations (which you are going to have a lot of) and for whacking away excess drywall.
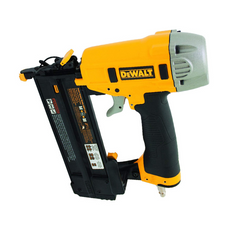
23. Finish Nailer
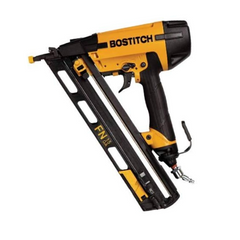
How will I use it? To hammer the nails into the baseboards and studs. Your life is going to be a lot better, installing baseboards with an air-powered finish nailer. These will increase the quality of your installation by securing your baseboards in place.
24. Brad Nailer
How will I use it? Brad nailers use smaller nails. These nails can be used for securing base cap and shoe molding to the baseboard without interfering with the nails securing the baseboard to the wall.

Baseboard Paint Prep - Caulking
25. Caulking Gun
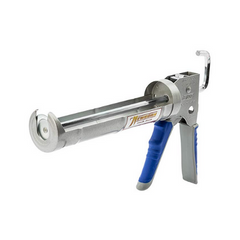
Is it required? Probably.
How will I use it? In most cases, when baseboard is installed you will have a gap between your baseboard and wall. Depending on how straight your wall is that gap can be small or large. To solve this issue, and create a finished look, you will run a bead of caulk in the gap. This is important if you plan on painting your baseboards.
26. Caulk Finisher

Is it required? No, it’s not.
How will I use it? This is a very simple tool and is handy when applying long beads of caulk. When used, it helps creates a consistent, uniform bead and removes any excess.
PRO-TIP: Some installers use other ingredients - like rubbing alcohol - to help keep the caulk from sticking to you. This elimates mess and confusion, but more importantly helps when creating a clean, professional looking finish that saves time - and towels.and this technique can save time - and towels.
Taking Good Care of Your Tools
Tools take up a big chunk of your total investment when getting started. This does not only involve money but time as well because after buying your tools, you need to make sure that they are properly taken care of. The first and most important rule in taking good care of your tools is learning how to properly operate them.
A lot of people simply proceed to using their tools out of the package and find themselves with broken tools. Only then do they realize that they have been using their tools improperly. Learning how to use a particular tool includes learning how to use it safely, and understanding the specific tasks it is intended to do.
Cleaning Your Tools After Use
To clean your tools, do not forget to first blow all the accumulated wood dust off. This can be done using an air hose or a canister of compressed air. Do not use water for cleaning your tools.
Most tools do not come with any corrosive coating, and if they do, it wears off after use. Make sure each of your tools are properly lubricated or oiled to keep the moving parts in optimal shape always, and avoid malfunctions. If your tools get broken or look worn out, you need to have them repaired or even replaced as soon as possible. Always store your woodworking tools in a dry and clean environment.
Treating Your Tools Like They Were Your Own Children
When allowing other people to use your tools, you have to keep in mind that their use and/or misuse is also your responsibility as the owner. This is because the person you are lending your tool to may not have the same understanding of its safe and proper use, and may not have the same respect for your tool like you do.
Tool Safety
Safety is of utmost importance when working with tools for home improvement projects. You must wear safety gear like eye protection or goggles, arm protection, as well as body protection. Never use electric tools on water, as well as on other hazardous areas.
When working, put measures in place so that other people do not interrupt you. Likewise, never consume or drink alcoholic beverages when working with tools. Drugs and alcohol are never compatible with power tools, or any tool for that matter as they tend to increase your risk of sustaining injuries.
Finally, do not attempt to operate a tool that does not look safe to use. Most of the tools-related accidents that lead to injuries and even death happened to victims who initially thought they could still squeeze out a little more work from an obviously defective tool or deemed that the risk was too small as they only needed a short amount of time to finish a particular job.
Images courtesy of Amazon or Manufacturer.